This article uses CKEditor 5 for illustration which is the text editor that comes with Drupal 10. The setup is the same for Drupal 9 and CKEditor(4) and the upgrade path from CKEditor to CKEditor 5 is stable. You can also use CKEditor 5 with Drupal 9.
Setting up the media in the text editor needs a little thought. If you use the default Olivero theme a lot of this work is done for you and the image configuration is good.
The only thing I have noticed with Olivero image setup is if you use the right sidebar you need to adjust for the align-right images as they cover the sidebar. Other than that it is pretty solid. The only thing you'll need to do is install Media as at present it isn't installed with a new instance of Drupal (yet).
The chances are you will want to create your own theme and if this is the case you will need to work out the image sizes you want to allow in the CKEditor and add the CSS to your theme. For the sake of this article, we are going to keep it simple and set up 2 image styles that can be used in the CKEditor. The 2 image styles are going to be 480px and 1090px, both of which come with a standard installation of Drupal.
Before we start, however, I am going to correct myself and start using the terms view mode and image style. It is actually a view mode we are going to set and then select an image style to use with the view mode. We are going to use the default view mode and the full content view mode. If this sounds confusing, that's okay as it can be. But once you understand you'll see how powerful this concept of view modes is. With that let's get going.
It is assumed that you have already installed Media, if you haven't then please check my article on Drupal Media.
Adding Media to CKEditor
The first thing you need to do is switch out the image upload icon for the media icon in the CKEditor toolbar. You have to do this for every text format you want to allow content creators to use.
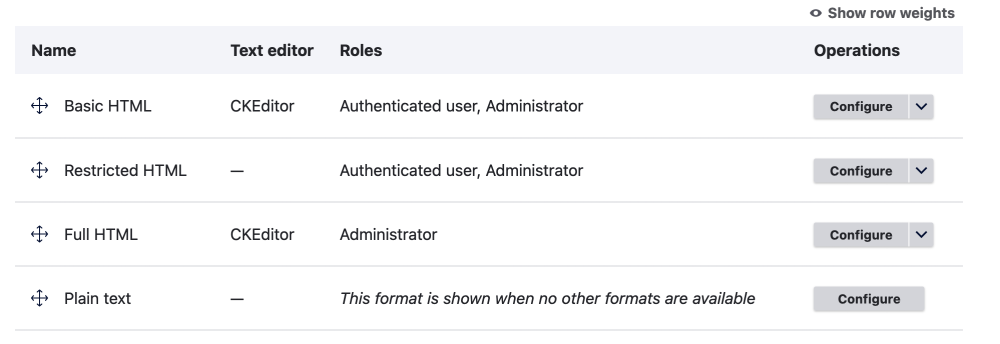
To do this, go to the text editors and format configuration pages. Choose the text format you want to set up and click Configure.
Manage > Configuration > Content authoring > Text formats and editors
/admin/config/content/formats
In the Toolbar configuration section:
- Remove the Image icon
- Add the Media Icon
Then you need to enable the embed media filter. Find the Enable filters section and check embed media.

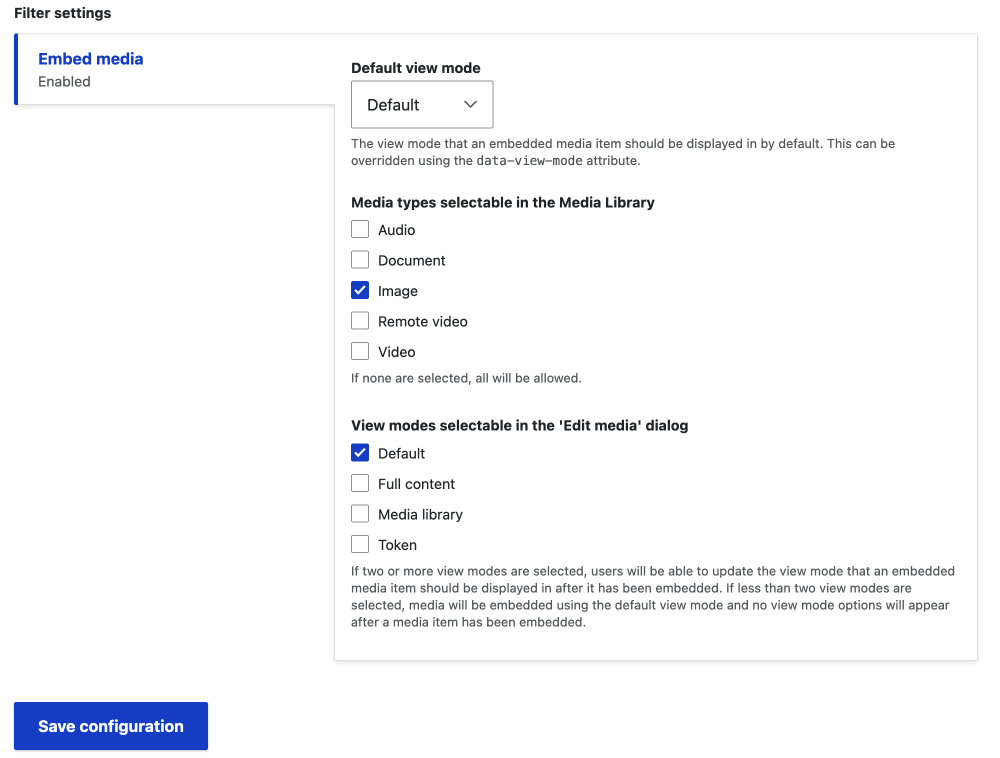
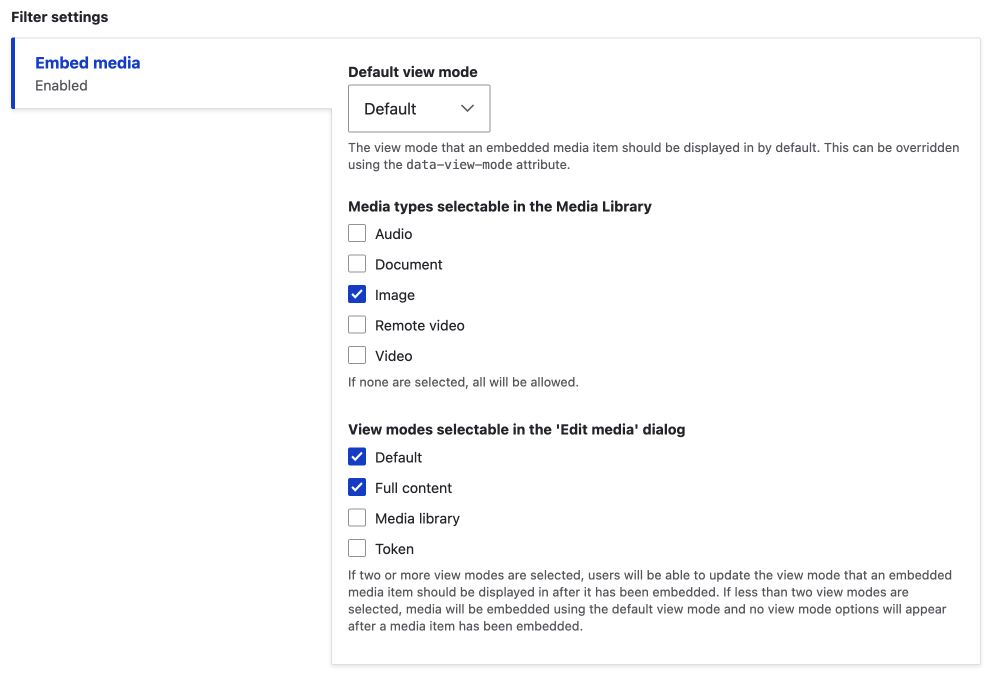
Next, you need to adjust Filter Settings
- Default view mode - Default (is 480px)
This is a good size but if you want to change it you are probably best to set up a new Image style and view mode. We will do this when we set up multiple view modes later in this article. - Media types selectable in the Media Library.
For now, we will only allow Images but obviously, the ability to allow all the media types is great. - View modes selectable in the 'Edit media' dialog.
For now, we will only allow the default view mode.
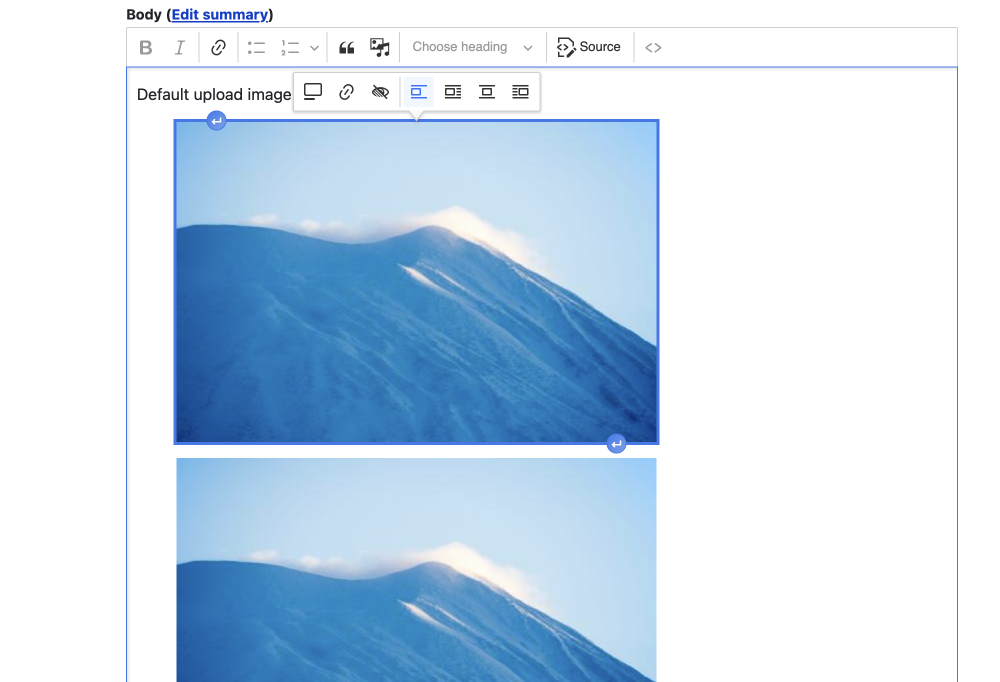
That's pretty much it, now if you go to your content edit form you can add images to your content in the WYSIWYG and they will be added to the media manager. Or you can use any of the images already managed by the Media module. However, you will notice if you add images that you need to add a bit of CSS to make them look good. So let's do that next.
Styling You Images
If you are using a custom theme, then you will probably need to add some styles to your images. In the case that you are using the Starterkit theme script to set up your theme then the below CSS rules can be added to your embedded-media style sheet and things should look great.
.node__content .text-formatted article.media {
  margin-top: 10px;
  margin-bottom: 20px;
}
.node__content .text-formatted figure article.media {
  margin-bottom: 0;
}
.node__content .text-formatted .align-center img {
  display: block;
  margin: 0 auto;
}
.node__content .text-formatted .align-left {
  margin-right: 1.5rem;
}
.node__content .text-formatted .align-right {
  margin-left: 1.5rem;
}
.node__content .text-formatted article.media.align-center {
  display: table;
}
So with this done, you will probably have noticed the maximum width of an image is 480px if you used the default view mode. This works for a basic illustration but sometimes you'll want to add full content-width images. Luckily this isn't too difficult and all the settings are included. We just need to configure it.
Add Multiple View Modes for CKEditor Media
If you want to allow multiple image sizes and allow the user to override the default view mode, then it is as easy as checking that setting when setting up the text format and editor.
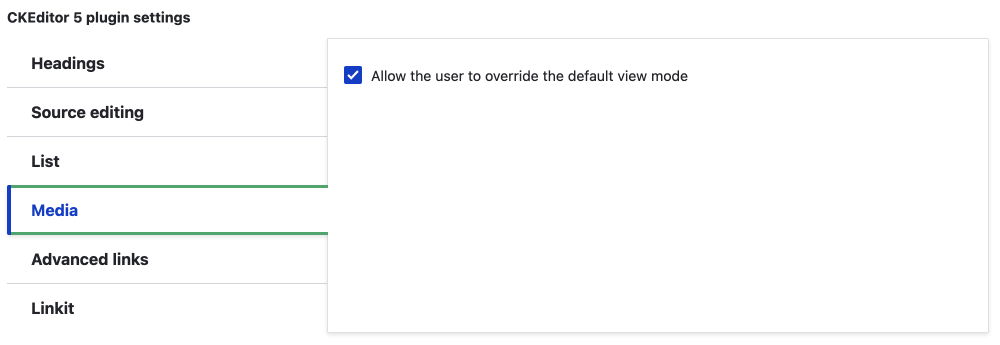
On the text format configuration page
- Find the CKEditor 5 plugin settings section.
- Click on the Media tab.
- Check Allow the user to override the default view mode.
Once you have this checked, then in the Filter settings at the bottom of the page you can select any number of view modes in the View modes selectable in the 'Edit media' dialog section.
If you add the Full content view mode as illustrated. Then you will need to also set that up as it isn't enabled by default. To do that, visit the Media Entities section and enable the Full content view mode for the media type you want to use it for. Since in this article, we are only allowing images to be selectable I will only illustrate how to do this for the image entity type.
Go to the manage display page for the image media type.
Manage > Structure > Media types > Image > Manage display
/admin/structure/media/manage/image/display
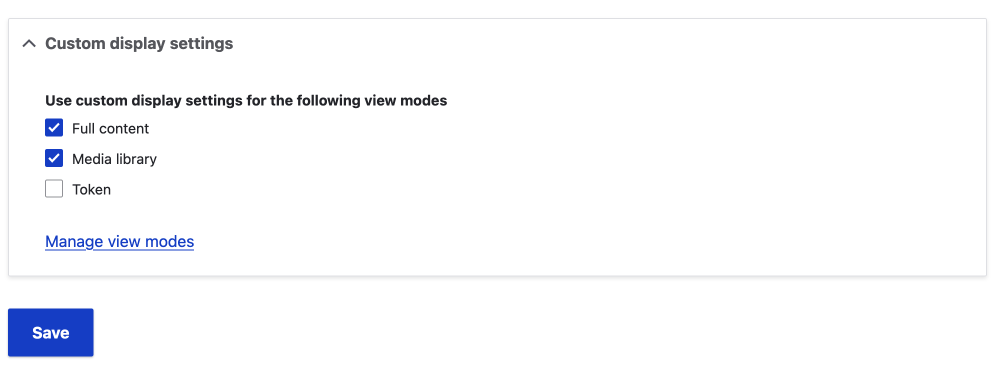
At the bottom of the manage display page.
- Open the Custom display settings accordion
- Check Full content view mode.
- Click Save.
Next switch to the Full Content tab at the top of the page.
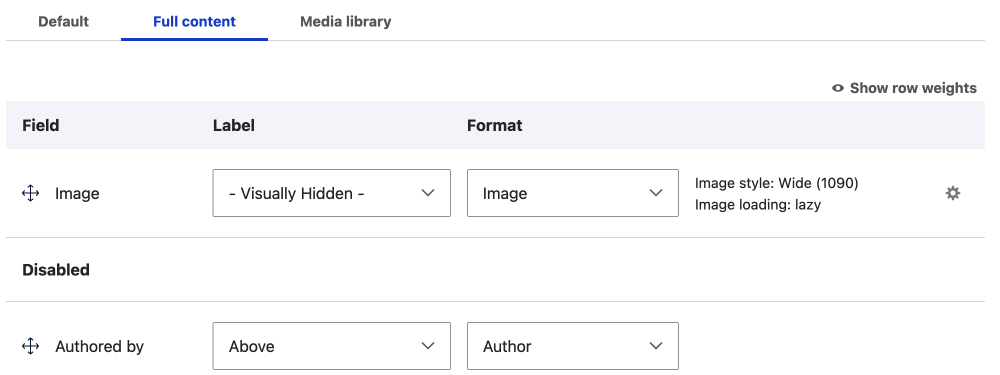
- Add fields you want to display for the view mode.
- Set the formats for all the fields you include.
I am only including the image field with the format image. Add the image style you want to use by clicking on the small gear icon. Note it is here you can choose responsive images for your format but that is a story for another day.
- Set the formats for all the fields you include.
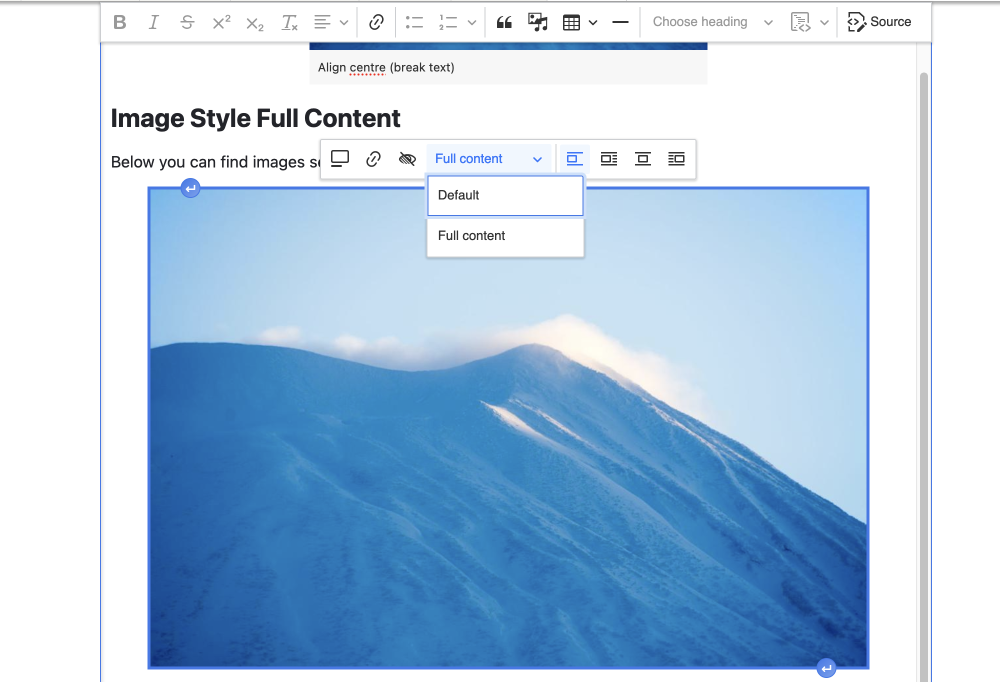
That's it, this gives you the full content view mode in the media modal in the CKEditor. One last thing you may need to do is add the corresponding CSS for your view mode so please test it carefully.
In this article, we looked at the most basic set-up of using Media in the CKEditor in Drupal. We set up 2 view modes and restricted media to only allowing images. I will be writing more about Drupal media in the coming months so if that interests you make sure to sign up for my newsletter. I write about front-end development and design.
Thanks for reading and until next time, seize the day!