This article was written using Drupal 9. However, this information is relevant to Drupal 10 also.
Out of the box Drupal 9 does not enable Media, it has a file upload functionality and a file content management page, an image field is present by default in the article content type which uploads to the file system. However, Media and Media Library are included you just have to install them.
Info
Requires: Everything needed ships with core.
Actively maintained: Yes part of core.
Basics
Following are the steps needed to get Media up and running on your site and adding a media field to one of your content types. This is the bare minimum but it should give you a good insight into how Media can be used within your application or website. After the basic set up I cover the set up of the CK Editor WYSIWYG which may also require adding CSS to your theme. I will point this out again but when setting up your site it is best to know how each image or media item will be presented on the front-end, will you be using the built-in Twig theme engine or will you be building a decoupled front-end, using Drupal as a headless CMS? All worth thinking about but for now, let's set up Media.
Install Media
Go to the Extend page from the Manage menu in the admin menu.
Manage > Extend >
/admin/modules
- Check core Media & Media Library checkboxes
- Scroll to Bottom and Click Install.
Configuration
We will only be adding an image media type in this example so we do not need to configure any settings, however below is an overview.
Media Setting
Manage > Configuration > Media setting
/admin/config/media/media-settings
- Security - add an iframe domain to serve third-party services from, this is not needed for image.
- Standalone media URL - We won't do this but you can "Allow users to access media items at /media/{id}". This is good if you want each media item to be viewable on its own page.
Media Library settings
Media Library adds the Media browser and image thumb to the field and without it, the experience is somewhat limited.
Manage > Configuration > Media Library settings
/admin/config/media/media-library
Only one configuration option.
- Enable advanced UI - We won't enable this.
Media Management and Media Upload
Manage > Content > Media >
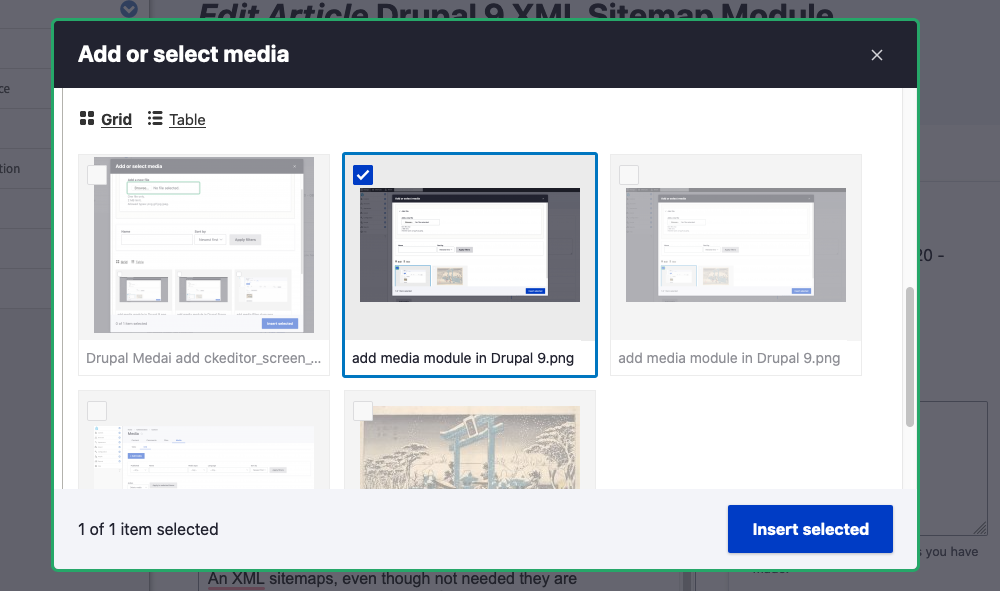
If you now go to admin/content/media a basic overview of media with table and grid tabs have been enabled, obviously no media is present but you can add media from this page. Click + Add Media and you will be taken to a page when you can add audio, document, image, remote video, video media types.
Set up a Field in a Content Type
We will use the Article type.
Go to Manage > Structure > Content types > Article > Manage fields
/admin/structure/types/manage/article/fields
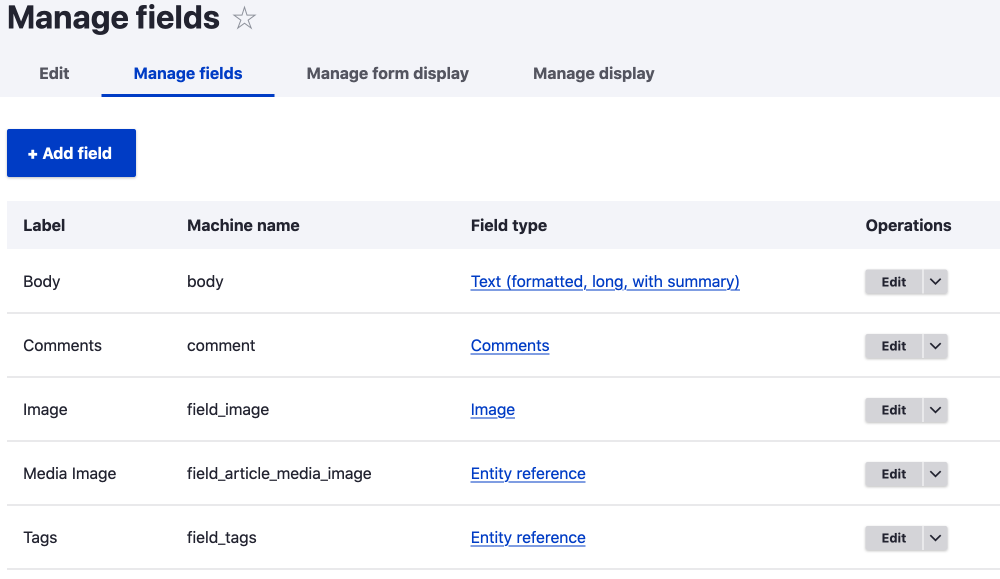
You will see the image field, you can delete or hide it later if it is not needed.
Add a Media Field
- Click + Add field
- Select: Reference Media (or Re-use an existing field)
- Give it a Label: We’ll call it Media Image and a machine name
Machine name is automatically generated but I like to prefix fields with the content type so they can be easily found later i.e. field_article_media_image, if you want to do this click edit. - Save
- Continue (to field settings)
Field Settings
You review the field settings on this page. Be aware that "Once you have added data to the field they can not be changed."
- Type of item to reference - you can not change this later.
- Allowed number of value - can change later, let's leave this as 1.
- Save Field settings (and be forwarded to Edit field tab).
Edit tab (for the newly created field)
You can add
- Help text - Add information to help a user about what the field is for.
- Require the field.
- Reference method - leave as default.
- Media Type - just add Image for now. You can allow all media types for the field if you like, this is more of a system design decision that you need to think about as you design your site or application.
- Sort by - -none-
- Default Value - you can add a place holder for the field.
- Save Settings
That was easy! You can now go to the content type edit form of existing content or add new content and see the field.
A few points to think about.
- As mentioned earlier you could now delete the default image field or disable it by dragging it to the bottom on the Manage form display tab.
- For the new field, you can easily change the position and field group it belongs too. On the Manage form display tab drag the field to where you want it to show on the content edit form.
- You can Manage Display of the field on the Manage Display tab. The label, format and position of the new field can be changed, and the change will be reflected on the front-end. You can also hide the field if you intend to use the images elsewhere.
As said, it is a good idea to know exactly how the media will be used and displayed from the get-go, but if you want to get it set up so people can start adding content you can always alter the settings and create new image sizes and styles at a later date.
So that's how to add a field of media type that is managed with media.
Okay, so we have a field now which can be one image or multiple images that can be reused or displayed how we like. You can display them directly on the page or build a slideshow, they can be referenced in other content separately or as a whole group if you have set allowed values to more than one. You can use them in a de-coupled front-end, the possibilities are limitless, your imagination is the only limit.
From here you will probably want to allow media images to be used within the text area using CK Editor.
Update the Text formats and Editors to Use the Media Library
Before you do this you will want to set up some image styles and view modes to use. If you already have your image styles set up you can skip to the content authoring & text formats and editors section.
Image Styles

Add a new image style
Manage > Configuration > Media > Image styles
/admin/config/media/image-style
- + Add image style
- Add Name - Media Full Width (1000px)
- Add Effect - scale to the width of our max-width, we can always change this later and regenerate all images to the new size, currently, our max-width on content article p is 1000px, so let's set it to that. Scale doesn't need height and allows upscaling.
- Add Effect
View Modes
You can use Full Content view mode or I recommend creating a new view mode.
Create a New View Mode
Go to Manage > Structure > Display modes > View modes
/admin/structure/display-modes/view
- + Add view mode
- Select Media
- Let's add a view mode Media Article Full Width
We now have a new view mode, we now need to configure the view mode on the Manage display settings page of the Image Media Type.
Configure the View Mode
If you haven't yet set up your style this is a good time to do it, see the previous section and add a new image style.
We will use the Media Article Full Width view mode we just set up but you could use the default Full Content View mode that is installed with Media.
Go to Manage > Structure > Media types > Image > Manage display
admin/structure/media/manage/image/display
- Click on the Custom display settings at the bottom of the page.
- Check Media Article Full Width
- Save
Next
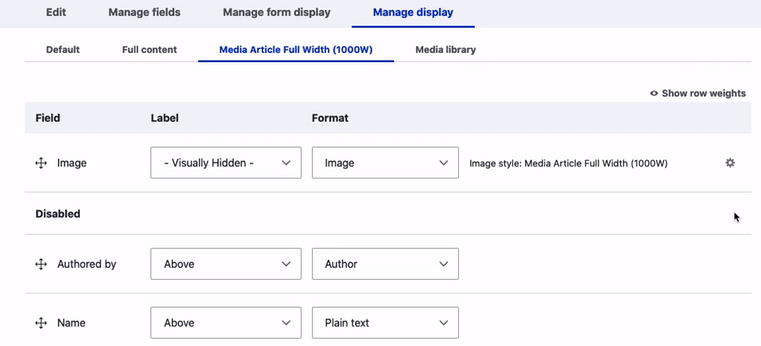
- Click on the new Media Article Full Width tab
- Click on the small gear next to the format.
For the image
- Use the style we set up in the previous section - Media Article Full Width (1000px)
- Link image to - nothing.
- Click Update - Note you need to also Save the display.
- Be sure to Save too.
Image Styles
If you install the Install the Responsive Image module you have access to larger images styles without neeeding to create them. Check the Extend page to install Responsive Image module.You will have access to a set of images prefixed with Max i.e Max 1300x1300 and can use these in your site.
I won't be covering the the Responsive Image module here but it is used to assoicate an image style with each break point defined in your theme.
Content Authoring & Text formats and editors
Manage > Configuration > Content authoring > Text formats and editors
/admin/config/content/formats
Let's configure Full HTML
On the text formats and editor page, click Configure next to the Full HTML.
- Click Configure
You will be directed to the Full HTML text format settings page. This page controls all the settings for the CKEditor, so has quite a few settings. Change the setting for the section listed below.
Text editor
- Swap the buttons Image for media
You can leave both image and media if you like, just note that if you use the image it won't allow your images to be re-used I.e. The images won't be managed by the Media module.
Important: For the Media button to be present you need to have Media Library installed, this should have been done when installing the Media module, see Install Media at the beginning of this page.
Enable Filters
- Check Embed Media.
Other filters will already be enabled.
Filter Settings
- Embed Media
Set what you like
- Default view mode - the view mode you want to set newly uploaded images to.
- Media Types selectable in the media library - we'll just allow image, but you could allow any of the Media types: Audio, Document, Image, Remote Video, or Video.
- View modes selectable in the 'Edit media' dialog - we'll allow Media Article Full Width and Default. If you want to allow animated GIFs you are best to allow Default.
If you had many, you would get the option to apply different image sizes.
You can have a host of view modes for your editors to choose from, but that’s another day.
Now you can add images from the Media Library straight into your content if you are using Full HTML text format.
Now update the other Text formats that use CK Editor that you will use. On a basic site you probably only need one but on a site with multiple user roles with different access needs, you'll possibly have multiple text formats.
On a commnuinty site you may only allow user to have very basic editing capabiltiies to keep design consistent. I have worked on sites where only text and lists where avaiable in some form fields, this is one of the strong points of text formats and permissions in Drupal.
So that's it, we now have a basic overview of how Media and Media Library modules can be used in a Drupal 9 application. Whether you are using Drupal 9 as a full-blown CMS or to manage media assets for a decoupled UI, I think the Media module is essential. In following posts, we will cover more on how to use Drupal to manage images and media as well as more general topics regarding images and video for the internet, be sure to sign up for the newsletter, and thanks for reading.