This article assumes you already have Git installed on your system. You can check if you have it installed by using git --version in your terminal and if you do it will show you the version. If you do have it installed you can run git and it will give you a manual of usage options and some common git commands.

Setting Up Git Installing
If you don't have Git installed go to the download page and download the latest version for your operating system. On that page there are also a lot of GUI Git clients, you don't need one of them yet as we are going to look at using the command line first so you can understand Git commands.
Git is one of those tools that if you master early then you will save lots of time. It is one of the tools you should learn first, starting on day one. In my journey, I didn't use it in day-to-day work1 and you may find it isn't needed too. However, if you spend a little time getting these basics down you will be ready to work with remote code more easily or even work with a team and contribute. With that let's get started.
First Things First; Initialize
When you start a new project you want to initialize your project. When you initialize a project you create all the necessary files and directories to track your project. You can initialize an empty directory or you can initialize a project you have been working on for a while.
So move into a directory on your system using cd your_project_directory with your favourite command-line tool. I use the built-in Mac terminal.
To initialize a project you want to run the git init command in the project directory, then add everything, and then commit everything. Check out the steps below.
Note that with add you use a period and with commit you use the -m option flag and a message inside quotation marks. Usually, the initial commit will be "initial commit".
git init
git add .
git commit -m "i commit"
That was easy! You now have an initialized project and everything committed up till this point.
Let's check a few other commands and see what they do and return.
Status and branch
git statusThe git status command will tell you if any file has been modified, if nothing has been modified it will return.
nothing to commit, working tree clean
git branchThe git branch command shows you the repository's branches and it shows you which branch you are on with the asterisk. On a newly initialized repository, you will only have a master branch.
* master
The Master Branch
So we have one branch called the master branch and we can make changes to the code and then add those changes to the staging area and then commit changes.
Go ahead make a change to the project and add and commit the changes.
This as such is pretty useless as in time you will want to make changes but don't want the changes to be part of the master. This is where a branch comes in, you can make a new branch, switch to this new branch and your master branch will be safe. So let's explore branches.
Add a New Branch
First, we need to add a branch and give it a name. In my case, I have named it responsive.
git branch responsive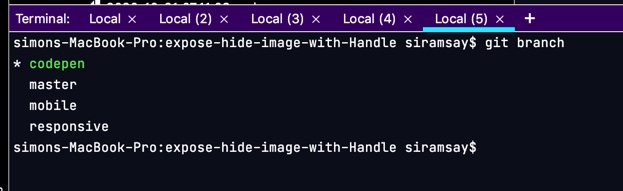
If you are following along and use the git branch command you will see that you are still on the Master branch, indicated by the *. Your new branch is pointing to the same commit in your working copy.
To switch to the newly created branch you use the checkout command like the following. This makes the new branch your working copy.
git checkout responsive
If you want to create a new branch and switch the working copy to point to the new branch you can checkout with the -b option flag.
Make a new branch and checkout
git checkout -b responsiveSo now we are on the new branch. Make some changes to the code and then try some of the commands we have already used. Try running:
git statusgit checkout master
What happens? Go try and then come back.
Okay as you can see we can't checkout otherwise the changes will be lost, you need to add them and commit them or we could stash them. We will look at the stash later so let's add and commit the changes.
error: Your local changes to the following files would be overwritten by checkout:
        README.md
Please commit your changes or stash them before you switch branches.
Aborting
So you need to add and commit your changes just like you did earlier.
$ git add .
$ git commit –m "many new changes for responsive branch"
Then you can checkout the master and merge the changes back into the master.
Merge into Master
To switch back to master and then merge the changes from the branch run these commands.
$ git checkout master
$ git merge responsive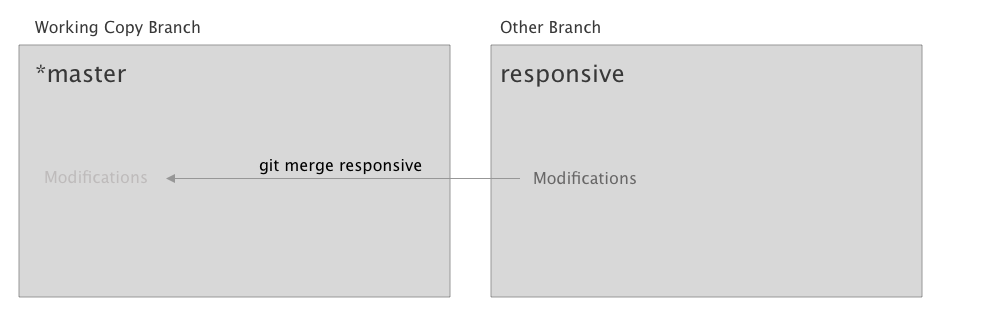
**If you want to get the changes from the Master you need to use Pull and it will merge for you. I will cover this in a future part.
You can also use -d flag with the branch command to delete the branch.
% git branch -d responsiveSo that the basic of Git, working on your local machine; creating, branching, and merging a repository. In the next part, we will look at using a remote copy of the repository so that you can truly use Git to its full power.
Thanks for reading and if you have any question, reach out by signing up to my newsletter, I will get back to as quick as I can.
1 I built my first website back in 2000, this was before Git was even invented. I slowly started using it but only in the last 3 - 4 years really pushed myself to use it from day 1 on a project. I still don't always start on day 1 for small projects but will in time initiate a repo if I start to make a lot of changes.