If you are looking to loop through the values from a multi-value field in a Drupal content type such as a select list, checkboxes, or radio buttons, you are in the right place.
Let's first look at how we can render a field in a custom node template. Below is the code that will achieve this.
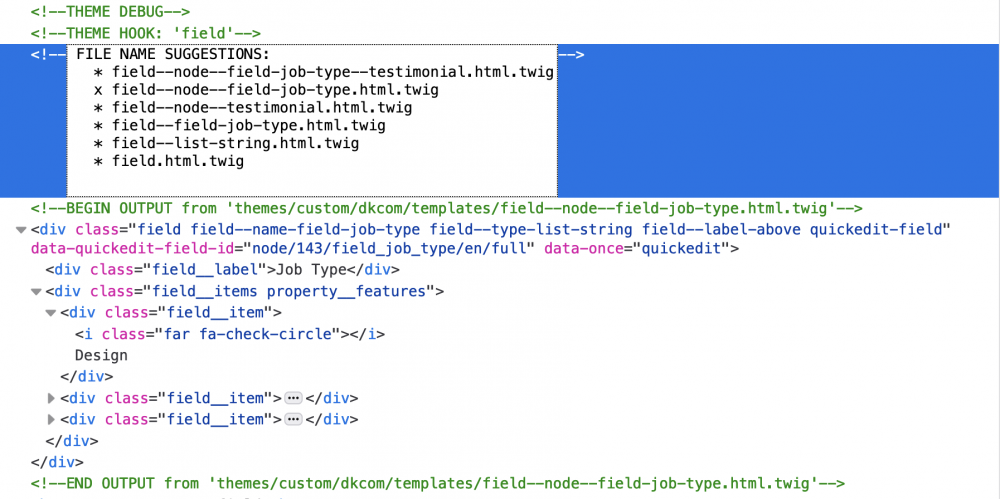
{{ content.field_job_type }}This code renders the content value which will usually come with a wrapper from the field template as shown in the image below. The image below shows the output from when you have Drupal debug enabled in your development environment.
Sometimes, however, you may want to add some custom code to the output of the field. You could do that by adding a new field template or you can also do it in the node template.
After much trial and error on my part, I found the easiest way to do this is to install the Twig Field Value module which adds a bunch of nice Twig filters. If you don't use this module you will need to write a pre-process function otherwise you can only get access to the select list key values.
Once you have installed the module, you can render the field values without the wrappers using the code below.
{{ content.field_job_type|field_value }}To create an array of the field values use the below code and then use a for-in loop to irritate over the values and add what you need.
{% set job_type_array = content.field_job_type|field_value %}Create a custom rendering of the field values with a heading
In the following example, I want to add an icon in front of the values and also if there are no values in the select list I want to omit the heading.
Let's make two variables. The first is an array of the values from the content field value filter as shown above and the second is the length of the array using the length filter. We use the Twig set tag to do this. You will usually add these to the top of your Twig template.
{%
  set job_type_array = content.field_job_type|field_value %}
  set job_type_field_value_length = content.field_job_type|field_value|length
%}
Next, we will look at how to render the individual values using a for-in loop. First, we name the individual values of the array, for example, item in items, and then close our loop.
{% for job_item in job_type_array %}

{% endfor %}
Next, we can access each value directly with the name we use for each item and add wrappers or other elements in each loop. It is that simple.
{% for job_item in job_type_array %}

  <span> <i class="far fa-check-circle"></i>{{ job_item }}</span>

{% endfor %}
Finally, let's add a heading that only shows when the array length is greater than 0 or is not empty. Below is how we can do that.
{% if job_type_field_value_length > 0  %}

  <h2>field_property_24_7_security</h2>

{% endif %}
That's it for this Druppet, that's a Drupal snippet btw, hope you learnt something or got what you were looking for. If you are interested in front-end development and design, and how to leverage Drupal, be sure to sign up for the newsletter where I share weekly tips and insights. Thanks for reading and until next time, remember to have fun in whatever you do!