Installing modules in Drupal is a fairly trivial task once you have a Drupal site up and running. This guide is going to cover Drupal 9, but the process is pretty much the same for older versions, too. We are going to look at 2 ways of installing modules, my preferred way to manage a site, Composer, a dependency manager for PHP, and then using the Drupal UI to install modules.
We are not going to go into the process of choosing modules and reasons for and for not choosing modules in this guide, I will cover that topic in another post sometime in the future. This guide is purely about installing and enabling a module.
In older versions of Drupal such as Drupal 7, I have used Drush in my workflow. Since Drupal 7 EOL is set I don't recommend using Drupal 7 if you are starting a new project. With Drupal 8 and Drush 8 onward utilities such as archive were removed so I only really use Drush for enabling and clearing cache from the command line.
Let's first look at using Composer.
Using Composer to Install a Module
Using Composer is a great way to manage your Drupal 9 site and in particular to install modules. For some modules, you will need to also install dependencies libraries and by using Composer this is all done for you. You need to be comfortable with CLI and have shell access, this guide also assumes you have Composer installed and is being used to illustrate how simple using Composer is. If you are interested in how to get Composer installed, make sure you sign up for the newsletter and I will notify you when I write about that and other great topics.
To install a module with Composer, we use the composer require command and then the package name.
To install XML Sitemap module type the below command into the terminal while in the root of your Drupal instance, the directory with the composer.json file in it.
composer require'drupal/xmlsitemap:^1.0'Below is the output.
./composer.json has been updated
> DrupalProject\composer\ScriptHandler::checkComposerVersion
Loading composer repositories with package information
Updating dependencies (including require-dev)
Package operations: 1 install, 0 updates, 0 removals
  - Installing drupal/xmlsitemap (1.0.0): Downloading (100%)
Writing lock file
Generating autoload files
> DrupalProject\composer\ScriptHandler::createRequiredFiles
Next, we can enable the module using Drush, Drush needs to be installed and can be done using Composer.
drush en xmlsitemapBelow is the output of the Drush command.
[success] Successfully enabled: xmlsitemapYou can now log into your Drupal 9 site to configure your newly enabled module.
For more information on using composer, please check out Using Composer to manage Drupal site dependencies on Drupal.org.
Using Drupal UI to Install a Module
This information is outdated.
From Drupal 10.4 installing modules via the UI has been removed. You can see the note in the important update information section on the Drupal 10.4.0 release page.
It is possible to install module in the UI still if you have the Project Browser module installed. This comes with the new Drupal CMS or you can install it on your website. Do note that Project Browser needs the web user to have write access to your Drupal codebase.
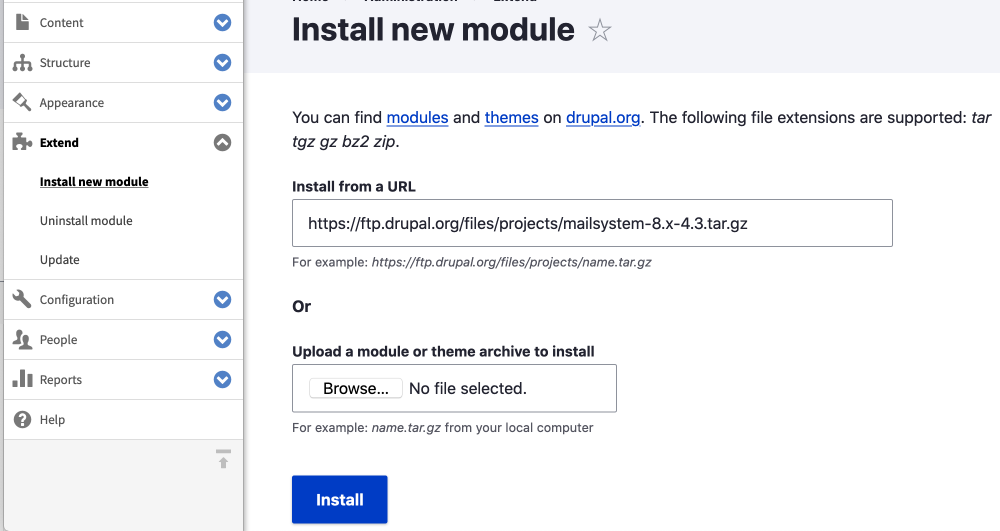
Drupal provides a nice UI for those who would prefer to install and manage modules that way. You can also update your module via the UI too.
Go to the Extend page from the Manage menu in the admin menu.
Manage > Extend
/admin/modules


- Click + Install new module
- Paste URL of module tar file in the Install from a URL input field.
- Click Install
You will be taken to a page with 3 options; Install another module, Enable newly added modules or Administration page. Let's say you want to Enable the newly added module(s). - Click on Enable the newly added modules to be taken back to /admin/modules page.
- Check the checkbox next to the newly added module.
- Scroll to the bottom of the page and click Install.
Presto! You can now use the module, some modules will need to be configured, so check the projects page and the README.txt.
Even though the process is painless to add new modules, I prefer to use Composer as it manages dependencies, such as third-party libraries as in the case of SMTP module needing PHP Mailer library, or if a module relies on another Drupal project.
Thank you for reading and be sure to sign up to the newsletter for more Drupal 9 tips and also modern Front-end development and UI/UX design content, you won't be disappointed.