In this article, I will look at Drupal Block fundamentals so you can understand what they are, how to make a simple block and then how to place a block on your new Drupal website. In the 2nd part, we will look at different ways of creating more complex blocks using views and other methods. Let's get stuck in.
Content Coming Soon. You may also want to read Defining regions in your template is an important part of a Drupal website.
Blocks and JSON:API
For those wanting to use Drupal as a headless CMS, blocks and block placement are exposed in the JSON:API. That means you can use them to get up and running with a Drupal twig based theme and then move to a headless or decoupled front-end down the road with no problems. For more information on using the JSON: API and blocks check out Blocks and the JSON: API.
What are Blocks?
Blocks are one of the main building blocks of a Drupal site. Blocks allow you to add aside content easily and place it in a region that you have defined in your theme templates.
Blocks are how you can display content in regions.
Regions are defined in your template, you can see the template regions by use the Demonstrate block regions (Theme Name) link.
Blocks Overview
Blocks can be made manually or can be generated programmatically. You can make custom block types think custom content types, where you can add any field you like to the custom block type, this is really powerful and you can do it all within the UI.
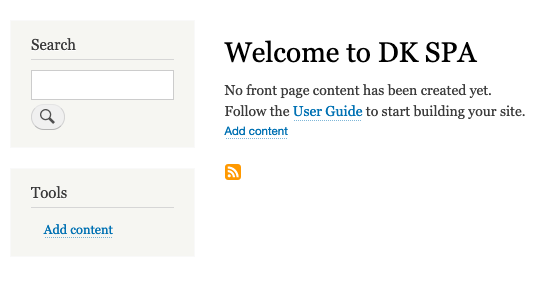
On a vanilla Drupal 9 install, there are many blocks created by default. These blocks are Menus, Powered by Drupal, Search, and Recent content to name a few. All these blocks are created differently but what they all have in common is they can be placed in regions on the block layout management page. Some of these predefined blocks are placed in regions for you by default. Some examples are search, powered by Drupal, and Tools or add content block in the left aside or the front page content block that magically disappears when you write your first article.
One of the most useful predefined blocks that isn't placed by default is the most recent posts block view, this block view can be used as-is or can be used as an example starter view as you will see in part 2 of this series.
As nice as these blocks are, you will want to make your own, possibly disable some of the pre-placed blocks or add some of the provided available blocks. Luckily Drupal makes this effortless, we will cover how to place blocks soon, but let's first look at the options for creating blocks.
Manually Making Blocks
Basic Custom Block
To create a block, you can use the basic custom block type, which has a description and a body. You can use this basic custom block type and add HTML and images so you can get some stuff up in regions without needing to customize things too much.
Over time however you will probably want to make some templates or more correctly custom block types and since blocks are field-able you can customize them how you like, just like content types.
Programmatically
Programmatically generated blocks can be made by using the Drupal system (i.e. views or menus) or adding a custom module that exposes a block.
System
Menus & Views both expose blocks, menus automatically create blocks, for views you need to select block as view display type explicitly.
Custom Modules
Making a block with a module programmatically is also possible. I won't cover it here, but I have created basic modules in the past and the Drupal API makes it easy to expose your custom module as a block.
Summary
Before we move on to creating a basic block, I will review the main points thus far.
- Blocks can be created using the default block type.
- You can create custom block types and add fields to them which allows for quick creation of banners, CTAs and the likes.
- Blocks can be created using Views, to make a list of related items, for example.
- Menus and navigation are automatically exposed as blocks.
- Can be programmatically created and made available to the system.
- There are predefined blocks that are installed with Drupal.
Okay, now we know what blocks are, it is time to create and place our first block.
Let's look at Creating a Basic Block
To create a simple custom block, go to the Custom Block Library page and follow the step below.
Manage > Content > Custom block library
/admin/content/block
< 10.1.x
Manage > Structure > Block layout > Custom block library
/admin/structure/block/block-content
- Click + Add content block (Add custom block)
- Select block type
- Fill in the add block form
Block Description
Body Add text or photo using CK Editor WYSIWYG
As an admin, you can change the text format of the WYSIWYG - Save
On save, you will be returned to the Custom block library page
This is nice, but you may also need to add custom styles to your template.
Now we have created a block, let's have a quick look at some of the pre-defined blocks that are available, and then we will place and configure the block.
View Available Blocks
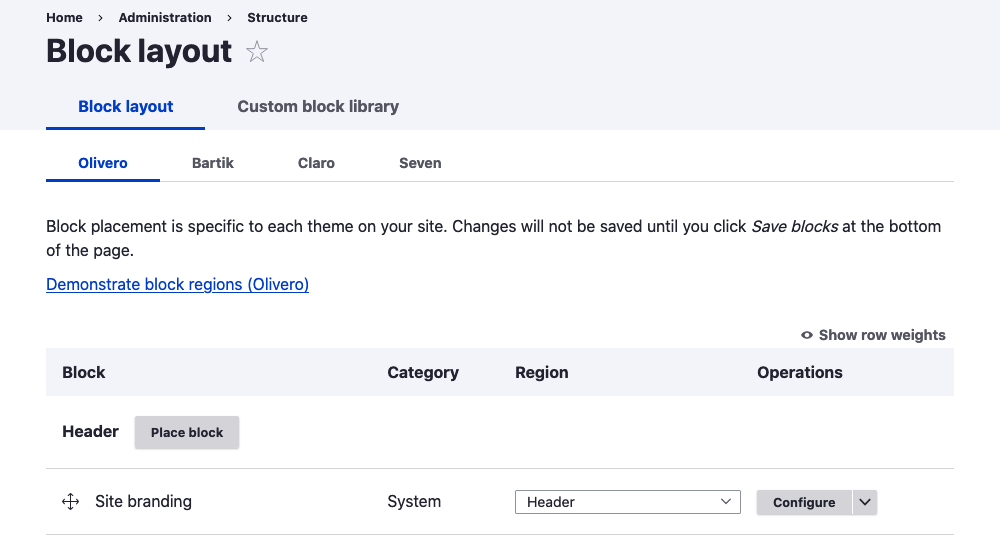
Manage > Structure > Block layout
admin/structure/block
To see the available blocks that come with Drupal, you need to be on the Block layout page and click the Place Block button that is next to the region names.
If you have made a menu, or made a list of content with views and exposed it as a block, these will also be available. So will the custom block you just created, all blocks will be available. From this page, you can also place a block, so let's do that.
Configuring & Placing Blocks in Regions
You can place blocks in your template regions on the Block layout page.
Manage > Structure > Block layout
/admin/structure/block
On this page, you can also:
- Demonstrate the block regions for the current theme.
- Drag and place blocks into regions.
- Modify existing blocks.
- Place blocks into regions.
On the block layout page, you can also:
- Access the custom block library using the tab.
- Access other theme block placement pages.
Modify an existing block
To modify a block that is already visible on the site, you can use the configure button in the operation column. You can also enable, disable or remove a block. You should note that removing a block only removes it from the UI, it does delete it from the system.
On clicking the configure button, you are taken to the configure page, where you can restrict placement to certain pages or users. See the block settings section following.
Place a block in a region
There are two ways to place a block.
- Use the place block button to select one or create a new block and place it.
- Drag it from one region to another and then enable it if need be.
Place Block Button
If you use the place block button, all available blocks created will be on the modal dialog that opens up. You can filter by block name if need be, and then to place the block do the following.
- Click the Place Block button in the right column of the modal dialog.
- Configure the block. You will then be forwarded to a configuration page for the block. Let's look at the block settings available.
Block Settings
Once placed in a region, you can configure blocks so that their placement is restricted to certain pages or sections of the site.
Custom Setting per block type
Each different type of block also has some settings that are specific to them. For example
Menus
Allow levels
Views
Extra settings such as Items per block if you want to override the default.
Display Title for views or not.
Override Title for views to create a new title.
Settings Available to all blocks
Visibility
- Types - Allows you to place on content type, allows multiple.
- Page -
On all pages, leave black
Show for the listed pages
Hide for the listed pages - Roles - You can show blocks just to registered users, admins, or all users.
To fully understand how all these settings work, you are best to play around with them, but generally the settings available are self-explanatory.
Region Placement
If you are placing a block from the Block Layout page from a button associated with a region, then the region will be pre-populated. However, if you have created a new block, you will also have the option to choose a region.
- Click Save.
Ordering Blocks
You will see the block now in the region on the Block Layout page. If you want to change the order of the block, then you can do that by dragging it above other blocks in the same region.
Check the block
Now go to the front-end of your site and check that your block is visible on the pages in the region you have stipulated. Placing blocks like this is a very easy and powerful feature of Drupal, you can place links to related content, menus, and custom CTA blocks in any region. Over time, you may feel you want or need more control over block placement and if this is the case you might want to look at the Context project.
Context
For more control over block placement and visibility you can use context, as your site grows more well-defined rules i.e show on these pages only if multiple conditions are true/false.
https://www.drupal.org/project/context
Styling Your Blocks
Another thing to check when creating a block is whether it looks how you want it? If it is a new block, either using a block type or created using a view, you may need to adjust the style. If this is the case you may need to add some new styles to your theme stylesheets, but a lot of the time if you designed your site and theme well then it will probably look fine.
Well, that's about it for creating simple blocks and placing blocks. Hope this showed you enough to get started. If you want to find out how to create more complex blocks, check out the next part of this article, Creating Blocks: Creating Customs Blocks and Custom Block Types in Drupal.
Thanks for reading thus far, be sure to sign up for the tech X design newsletter.