Adding a Template to your Theme
Most of the time, creating a template is the easiest solution when creating custom designs. To do this, you'll need to get the template name, create the template, and then add the relevant markup and CSS to layout and style the component.
Create a Block Type Template
If you intend on allowing both global and inline use of your custom block, you are best to add two templates because global blocks only come with a random number class for each block, making it hard to target with CSS.
You may need to target the block wrapper if the block has more than one field or as we have in this example there can be up to four paragraph type instances added.
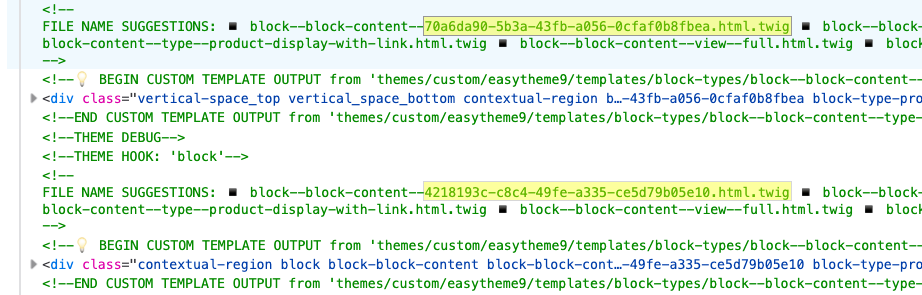
To add a Block template, make sure you have Twig development mode enabled (/admin/config/development/settings) so you can easily find the best template name.

In this case, I am creating a template for the block type. No need to target the full display or the instance; for this we can use the block--block-content--type--product-display-with-link.html.twig template as it will cover both cases.
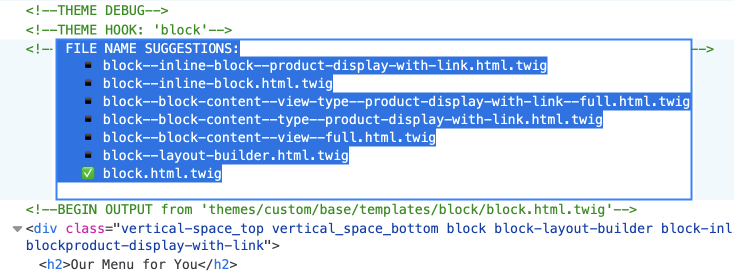
You can also see that the current template, in green print, is themes/custom/base/templates/block/block.html.twig. Copy the template into your theme with the new name suggestion and add a class; I added the block-type-product-display-with-link class. The rest of the template will remain the same.
{%
set classes = [
'block',
'block-' ~ configuration.provider|clean_class,
'block-' ~ plugin_id|clean_class,
'block-type-product-display-with-link'
]
%}
<div{{ attributes.addClass(classes) }}>
{{ title_prefix }}
{% if label %}
<h2{{ title_attributes }}>{{ label }}</h2>
{% endif %}
{{ title_suffix }}
{% block content %}
{{ content }}
{% endblock %}
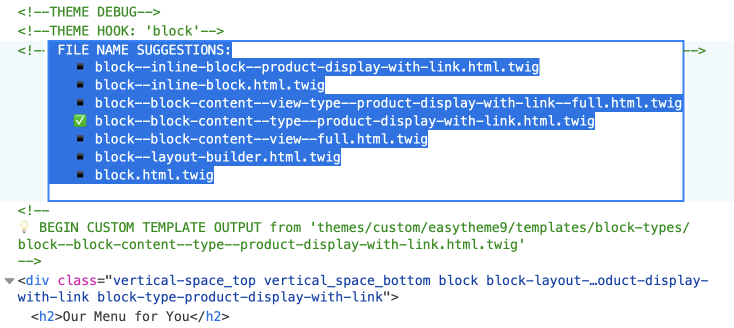
</div>Now when you check the development inspector you should see the new template has taken effect. If it hasn't, clear the system cache.
Note: With the modern :has() selector, you could skip the block template. The point is you need to be able to target a wrapper of the paragraph items. I like to add the template because it gives a more visible and verbose structure.
Create a Paragraph Type Template
Now we need to do the same for the paragraph type. Copy the paragraph.html.twig template. You can find the default template in the Paragraphs Module directory; modules/contrib/paragraphs/templates/paragraph.html.twig
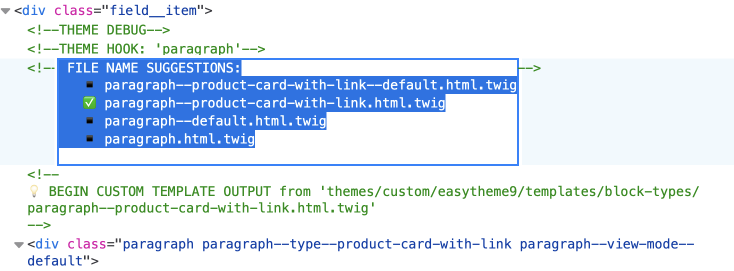
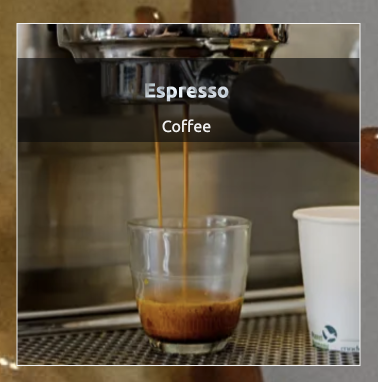
Add it to your theme with an appropriate name. Below, you can see the final output with the templates that I could have used; showing that paragraph--product-card-with-link.html.twig being in use.
Below is the template code I added so that the link wraps the image, and the title and subtitle overlay the image.
{% block paragraph %}
  <div{{ attributes.addClass(classes) }}>
    {% block content %}
      {% if content.field_link.0 %}
        <a href="{{ content.field_link[0]['#url'] }}">
      {% endif %}
      {{ content.field_media_image_product }}
      <div class="product-card__title-wrapper">
        {{ content.field_product_name }}
        {{ content.field_category_sub_title }}
      </div>
      {% if content.field_link.0 %}
        </a>
      {% endif %}
    {% endblock %}
  </div>
{% endblock paragraph %}
For most of your fields, you can render using content.FIELD_NAME pattern.
For the link, we only need to use the URL, so we need to dig a little deep. You can find more information on how to find the different properties of a link field by reading the Drupal Link field.
With a bit of CSS magic, your paragraph items will look like the design below, or you can check the demo site for it in action.
Once we have our block type set up, it is ready to use. Well, almost. In the next chapter, Using Your Custom Block Types In Layout Builder, we will look at how you need to set up restrictions and then how we can use the custom block type.