Using Drupal as a Headless CMS
When first using Drupal as headless CMS for a simple website with a contact form and articles from this site I hit my first hurdle in this new headless paradigm. And that is the security of the headless CMS and in particular, needing to use an access key or token to access the endpoint of the Drupal JSON:API. I wrote about how you can use the Key Authentication module in Drupal to hide the user and password from unscrupulous users that could use them to hack your site easily. Even though using key authentication hides your credentials to gain access to the system, it is still not good practice to expose the authentication key in your front-end or consumer. After a lot of reading on the topic, including using CORS, I found out, and now totally subscribe to it, that any authentication method should be hidden from the front-end and any requests to the headless CMS should be done from a server.
Related: Key Authenticatiion Module for Drupal
So with knowing this and learning about using a proxy server to process requests on the server I set out to create my own. However, in this research I came across Drupal API proxy and low and behold it does exactly what I needed, well kind of, I will point out its limitations as per the current 2.x branch later in the article. In the meantime let's continue.
Since my API is from Drupal and I very much like Drupal, this seems like the perfect solution and it is! In this article I am going to run down on using it and what I have discovered in doing so.
At the time of writing the project page, is somewhat confusing and the stable release doesn't have great documentation so I am going to outline my findings which will hopefully help you understand how it can be used.
Info
https://www.drupal.org/project/api_proxy
Actively maintained Yes, 237 sites report using it at the time of writing.
Requires You need to create a plugin.
Libraries No library.
Install either using the UI or composer.
Basics
The Set Up
You can install API Proxy like any other module but as such, it won't do anything. This is because you need to add a plugin as stated on the project page. If you aren't a backend developer like myself you will probably be unsure how to use the sample code found on the project page. Luckily, there is a sample plugin on Drupal code included as part of the current development version. You can find this by using the source code link on the project page which takes you to the API Proxy project on Drupal Code.
Creating your own plugin
I might be wrong here but from what I understand a plugin needs to follow a strict naming and directory structure to be found and registered. If am wrong then please let me know but what I write here works and that's the main thing without getting too technical with plugin syntax and annotations. If you want to read about annotations-based plugins and systems I suggest you read Drupal.org as it has a good run down and advises you to poke around the code of plug-ins in the wild.
The first thing you will want to do is copy the directory from Drupal code to a new directory. I like to use the accepted structure for custom modules and that is placing your custom modules in a custom directory in the root module directory as shown below.
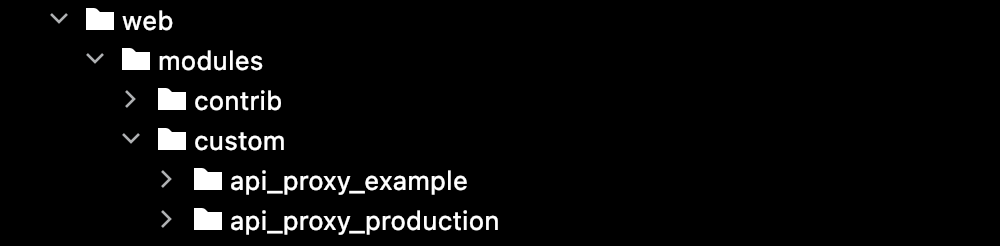
You can see the API proxy I have created here called api_proxy_production alongside the example plugin.
You could just leave the API proxy example code as is, upload it to your server, and install it but if you want to add multiple plug-ins you will need to change a few values and file names. We will do this in the next steps.
The Steps
There are only a few things you need to change. You can also change the description and label even though this is not necessary to make it work. But documentation is a good idea so I recommend you do. The following are the changes you need to make.
- First, duplicate the directory and rename it
api_proxy_NEW_NAME. - Next, rename
api_proxy_NEW_NAME.info.ymlto match, you can change the name and description in this file but leave the rest as is. -
Next, you need to change the name of the plugin file to match. This is in the src/Plugin/api_proxy directory and is a PHP file. Rename it
NEW_NAME.php. The change the values in the plugin file as outline below.You might find when you change the name of the file your IDE will alert you to the class name needs changing. This is the case if you use PHP Storm. However, even if your IDE does this for you, you will need to change a few more things in this file too.
First, change the namespace
namespace Drupal\api_proxy_NEW_NAME\Plugin\api_proxy;The change the following values in the Annotation block
- slug id
- label
- description
- service URL
That's right it looks like a comment block.
/**
 * The Example API.
 *
 * @HttpApi(
 *   id = "admin",
 *   label = @Translation("Admin API"),
 *   description = @Translation("Proxies requests to the Admin API."),
 *   serviceUrl = "https://designkojo.com/jsonapi",
 * )
 */
Finally, change the class NEW_ NAME
final class Admin extends HttpApiPluginBase {
Okay, so you have made the changes, now you can upload it to your server and install it and then visit the plug-ins page. Installing is no different for a contributed module, go to the extend page, find the module, check the checkbox, and then click install.
Once installed you will now have a plugin registered and it will have its own tab with a configuration form. Visit the API Proxy setting page which can be found at the following path.
Manage > Configuration > Web services > API Proxy
/admin/config/services/api-proxy/settings
One of the first things you will want to do is to add your user name 'token' to your setting.php files in the pattern that is shown once installed.
$config['api_proxy.settings']['api_proxies']['admin']['auth_token'] = 'YOUR-TOKEN';
Another thing I will note is that I changed the value of the #title of the more stuff input field to password as we are using this field as the password for the user in the basic authentication string. So add your password in this field.
Other fields I found you need to add are the, allowed origins, allowed methods, and allowed headers. These values are what you will have set in your mod_headers.c code in your <VirtualHost *:443><Directory> section in your site-available config file on the server of the site you are accessing. If you need to set this up please check the article on connecting Vue.js to Drupal.
Setting Permissions
Once you have all this set up you will need to set permissions so anonymous users can use it.
Manage > Administration > People > Permissions
/admin/people/permissions
Or from the Extend modules page
/admin/people/permissions/module/api_proxy
Now that you have enabled it and set the permission you can use it from your front-end consumer in the new pattern as shown below.
JSON:API endpoint:
//designkojo.com/jsonapi/node/article
Proxy endpoint with an id of Production:
//digikojo.net/dkone/web/api-proxy/production?_api_proxy_uri=node%2Farticle
A couple of things to note are:
- You need to encode anything after the equal sign, you can check the project page for another example.
- You don't need to add the authentication in your consumer and if requested from the origin URL will be accepted. You can see the fetch code for a Vue.js app here.
I have tested using the API proxy to access a jsonapi/node/article endpoint on the same site and also forward to another domain. Both cases worked.
However, this is where the limitations are as it is still possible to use this API endpoint from a server using cURL.
Specialized User with Restricted Access
So with this in mind, you will still need to create a user specifically to access what is needed and no more. This is possibly good practice anyhow and luckily, with Drupal, this is pretty easy: Create a new role, create a user, assign the new role to the user, and then give the role the permissions. This can all be done on the People page.
Add Authentication to the admin page on the front-end
It would also be good practice to have protected front-end pages if you were allowing users to create and modify Drupal entities from the detached head but that's a story for another day. Just be sure that if you only want specific users to do certain things make sure all other users can't easily access the pages.
I hope you learnt something here. If you did and are interested in front-end development and design or using Drupal as a CMS, be it headless or a standard alone site, be sure to sign up for my newsletter below. Thanks for reading and until next time, have a great day.
Add new comment