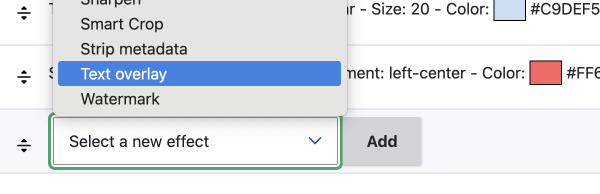
This guide is on how to use the Text overlay effect from the Image Effects module combined with the TextImage module to create images with text on them. The effect is called text overlay in the image styles select a new effect select menu. If you are unfamiliar with image styles, please check the main image styles article; there is a wealth of info on image styles basics there.
Important Points to Know
To start, I will make three important points so that you don't have to pull your hair out like I did:
- To use text fields from the same entity that the image is on, you need to install the Textimage module. The Textimage module provides node, file, and, user tokens which are the secret source to using custom text on your image.
- To use tokens provided by the TextImage module, you need to use an image file field.
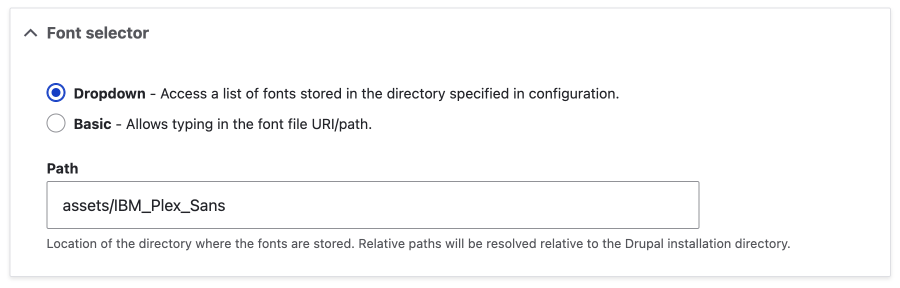
I was unable to get a Media image field to work. I think this is because the Media fields are entities, and thus you would need to add the text field to the media entity. This may be possible, and I will let you know if I have nay luck at a later date. In the meantime, make sure you use an Image field added as a file field. - You need to provide the font files by adding the route to the UI. I recommend adding the fonts you want to an assets directory and enabling the dropdown setting as discussed on the image effects page.
I added the asset directory to the root of my site and dropped the font files in there. If you want to use variations, such as bold, you'll need to use the static font files as there is no way to use variable font axes options
With the important stuff out of the way. Let's have a look at creating an image with a text overlay.
Creating an image with text
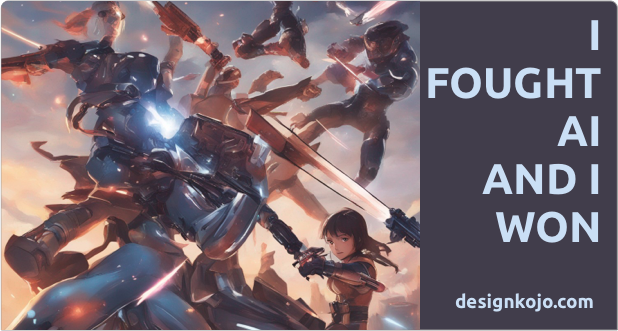
There are possibly many reasons to do this, but one that comes to mind is to create Open Graph or Twitter images. I made the following image a few years back to use as a Twitter image; it was created in photo editing software, then exported, and uploaded. So let's try re-create it with text overlay effect.
The first thing you will want to do is set up your fields on your content type.
For this text image, we only need two fields. An image file field and a plain text field for the text. If you wanted multiple text fields with different font weights and sizes, then you would need to add more fields.
For the designkojo.com text, we don't need to allow this to be edited, so we don't need to add a field for this.
Adding the Image File field
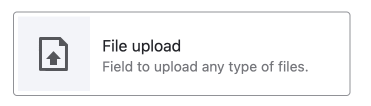
I know I have said this, but I really want to make it clear: Use a file field or, as it is called in the UI, a file upload field.
You will possibly want to stipulate the minimum image size on the field. For this, I am going to make sure people add an image at least 700 x 628. Do note, OG and twitter images are 1600 x ~630px, and we will set that in the image style as you will see soon.
Adding the text fields to the content type
For text, you will probably want to use a plain text field. This is because any formatting is done in the image styles UI.
Design Considerations
You may want to add text limits on the text fields. This is quite normal for advertising and is critical when generating text on images, as if you add too much text you will break the image.
You can set the maximum characters in the text settings when setting up a field; after a field has been set up and used, this cannot be changed.
I recommend you use the MaxLength module so that people adding the text have the limitation apparent when creating the image.
Also note that you may need to deal with long words sometimes; my advice on is to make your designs to allow semi-long words. I'll let you decide how long a word you will allow, but the design of my images allows 11 characters.
Once you have the fields set up, it is time to set up the image style.
Create Your Image Style
Image Styles will generally include various styles or effects layered on top of each other, as shown in the following image.
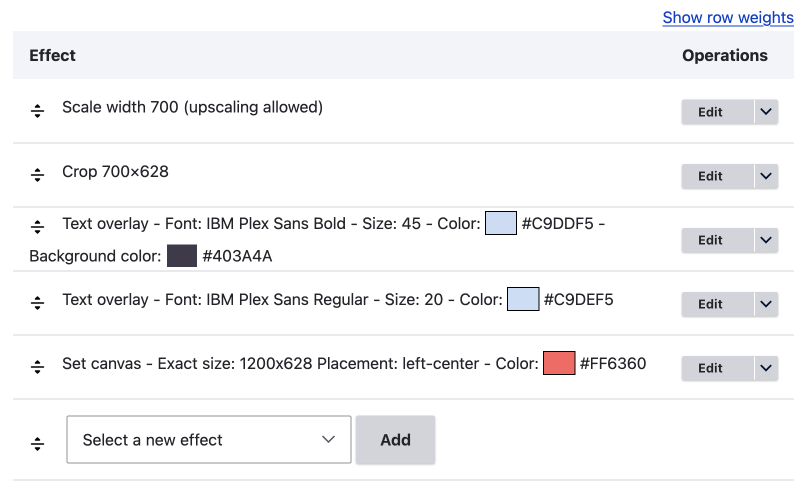
When I first set this up, I used only an image crop and then overlaid the text. However, I found that this didn't work well for my design as the text was on top of a coloured background and the image would expand full width of the text. So I have also used the set canvas effect for the best outcome.
For the set a canvas effect, I found it best to have at the bottom of the effects layers as shown in the image at the start of this section with the layers, and in the setting have it set to the top left. This does mean you need to make sure all the other content is sized correctly, mainly length of text so things don't get cut off.
Following are the effects I have added to make the final text image. They are performed from top to bottom.
Scale and Crop
Scale Width 700 (up-scaling allowed)
This technically isn't needed in the end, as I made the image minimum size to be 700 x 628.
Crop 700x628
This is a simple crop.
You could use a focal point crop, so the user could upload any size image and set the focal point of the crop.
Text Overlays
Text Overlay 1
This is for the Custom Text - You can see the basic of the settings in the UI, however there are a lot of setting available. They are broken down into 4 sections
- Text default
- Font settings
- Text settings
- Layout Settings
Text Overlay 2
This is for the URL, in my case, designkojo.com. Since this is the same on all image, I added this as static text.
You will also note that this text doesn't have the dark background, as I made the background for the first layer extend to the full height of the image.
Set a Canvas
Finally, I added the canvas
Set Canvas
This has all the normal settings you'd expect for a canvas. I add a background colour, but if you have an image and the background on the text overlay, this isn't really needed.
Textimage options
One last thing is to decide where the image will reside (be saved to) in Textimage options at the bottom of the image style edit page. Your options are public files or privates files.
This is now set up and ready to be used.
Adding the Image Style to your Field
The image style is now available in the system to be used on any image or media field. Obviously, it will only be useful on the file field we created it for, so go to the manage display tab for the content type and set the field format to Textimage and choose the image style.

Setting up MetaTags
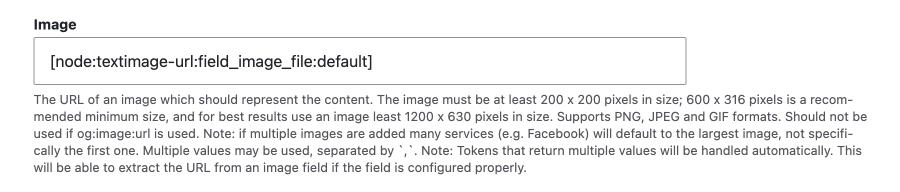
The final piece to the puzzle is adding the URL for the image to the meta-tags.
You can get this URL from the Tokens. But the pattern you use in [node:textimage-url:field_image_file:default] Where the field_image_file is the machine name of the field as shown in the previous image.
Remember, you will need to have the TextImage module installed to have use of the tokens.

Add the token to the Metatags field for OG and Twitter images.
To find out more about Metatags module, please read:
https://designkojo.com/the-essential-drupal-seo-modules#toc-metatag
https://designkojo.com/get-more-engagement-with-twitter-cards
Summary
We have looked at how we can use the Image Effects module's text overlay image style together with the TextImage module to create an Open Graph and Twitter image for your content.
We first covered the importance of using the add-on TextImage module, before moving on to setting up the fields on your content type so we can add unique images and text for each image generated. After setting up the fields, we looked at the image effects that I layered to try and re-create a Twitter image I made a few years back. Below is the final render.

All in all, this is pretty good. The only thing that is not the same is the text layout. If you wanted the same layout, you could add five text fields, one for each line. However, what we above is very versatile; you can add any image and any text without needing to worry about manually breaking lines.
I hope this is useful; if you need exact settings, please drop me a message and I can send you a PDF. Other than that, please sign up below for the weekly newsletter. I write about design and development with a focus on Drupal as a framework.
Simon